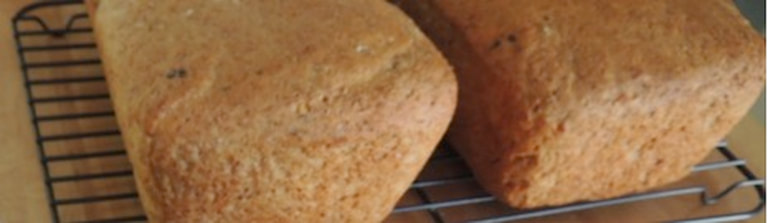
 Here it is! The recipe many have been asking for. The original recipe, a basic homemade white bread, has been adapted and changed throughout the years by my father years ago (before I was born and I was spoiled with homemade bread throughout my childhood. I grew up eating this bread for everything, from school lunch sandwiches to Sunday morning french toast, and am now lucky enough to have my husband take a liking to it and learn how to make it, too! Now I get to enjoy homemade bread for many more years to come! There is no dairy in it and it has been adapted to have honey instead of refined white sugar. You will love this bread if you give it a try! It is homemade - which means you need to dedicate some time to it, but honestly once you do it a couple times, it's easy and you get used to how long it takes - or so says Lee. Let me know if you try it!
Recipe/Instructions as written out by Lee and passed down by my father: What you need: Whole Wheat Flower Extra Virgin Olive Oil Sea Salt Active Dry Yeast (I like the Fleischmann’s brand that’s in a jar - not the packages) Honey or Maple Syrup Hot Water (from tap) Dairy and soy free butter Bread pans (4 to 5 of them for this) Optional: Flax Seed or really any kind of seed you want to add! Directions: Step 1: Mixing & 1st Rising In a large bowl, fill it half full of hot water (2L) (If making Pizza dough, fill it a 1/2 L or 1L) Add in a large spoon full of Honey Stir into water until dissolved Add in Yeast (Fill palm of hand, dump it in the water, then do this one more time) Wait until the yeast activates and floats to the top of the water (Could take up to 10 minutes) Add in Oil until it clouds up to the surface of the bowl Add a pinch of sea salt **If adding flax seed, add it now (1 cup of flax seed) Start adding flower, one cup at a time Mix it and keep adding flower until it’s almost a ball of dough in the bowl Place a little flower onto cutting board (to keep dough from sticking) Dump bowl onto a cutting board on table Clean bowl Keep adding flower (1 cup at a time) but start to knead it with your hands The dough should start to stick together. Form it into a ball and poke it - if it doesn’t bounce back, it’s ready for it’s first rising Grease bowl with dairy and soy free butter Place dough into bowl, and flip it so the butter coats both sides Cover with towel and place in a draft free space for 1 hour (I like putting the covered dough in the oven - it’s draft free!!) ***If you’re in a rush and making Pizza, you could just spread the dough and cook the pizza now Step 2: 2nd Rising Once dough has risen for the 1st time, remove towel and punch the dough to deflate it. Add a little flower to cutting board to keep dough from sticking Dump dough on cutting board Knead it with your hands for 5 minutes (dough should bounce back when poked) Let sit for 5 minutes and prepare bread pans - grease the with dairy and soy free butter Cut slices off of dough, about the length of the bread pan Knead individual pieces, then place into bread pan. For dough made with Whole Wheat Flower, you need to fill the bread pan 3/4 full or more. It’s slow to rise. Flatten down into bread pan Repeat until all dough is gone. ***If making Pizza - you can just spread the pizza dough and cook the pizza now (cooking instructions down below) Place bread pans (full of dough) into a draft free area (a warm area will help it rise faster) Let it rise for a 2nd time - this time it needs to rise for 1:15 (or could be a bit shorter or longer - check it at 1 hour to see if it’s risen where you like it) Step 3: Cooking Turn on oven to 400 degrees (F) Once pre-heated, place 2 to 3 pans in at one time Cook for 35 minutes Remove To tell if it’s done - tap on the top of the bread when it comes out, if it feels hard and sounds hollow, it’s done! When remove it from bread pan - flip it over and tap on the bottom of the bread, same thing - if it feels hard and sounds hollow, it’s done. If not - place back in over for 5 minutes. Let cool. |
All Vegan, Refined-Sugar-free, Soy-free. A sprinkling of Gluten-free. And a pic of my babies, when they were babies. :)

Recipe Categories
All

|
 RSS Feed
